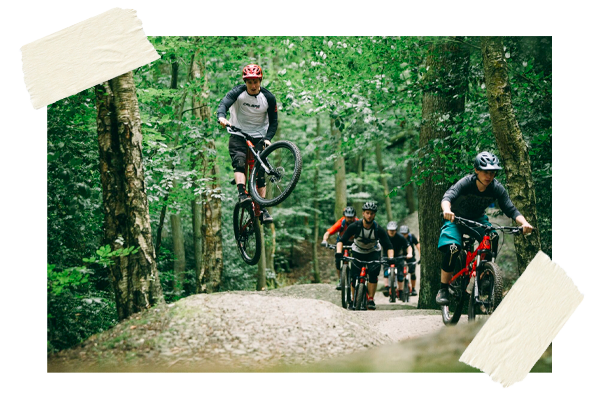
Basket Close Menu Search Store Finder Twitter Facebook Instagram Blog Engage voice search
Alt Text Here Alt Text Here

This is Mountain Biking

Meet Mountain Biking, cycling’s most rowdy relative. Fast, fun and dirty, Mountain Biking is all aboutenjoying the thrill of two wheels off-road. Not only is Mountain Biking great for fitness, it is sure to challenge your coordination and from time-to-time your nerves too.

In 10 minutes, learn everything you’ll need to know to get out on the trail and begin Mountain Biking.Now buckle-up and enjoy the ride.

Jump to section:


The different types of mountain biking
Glossary of mountain biking jargon
Choosing a mountain bike
Basic mountain biking skills
The other gear you’ll need
Pre-ride bike preparation and changing an innertube
Where to ride

The different types of mountain biking

If you’re new to Mountain Biking, you might be bewildered by all the jargon and terminology. We’ll keep it simple. Mountain Biking is made up of four main disciplines: Cross-Country, Trail (not to be confused with “trial”), Enduro and Downhill. They are all off-road cycling but cover different terrain and varying amounts of adrenaline!

Cross Country

XC mountain bikers like nothing more than blasting along dirt tracks and bombing along narrow trails. They love the challenge of a climb and the exhilaration of descending equally. Like road cyclists, distance covered and speed are their measures of a successful day out.
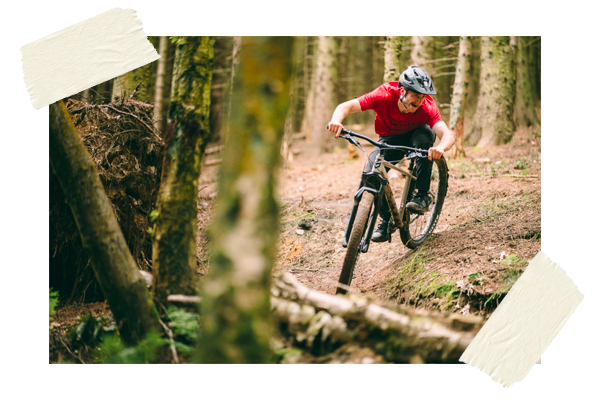
Alt Text Here

Trail

Trail riding turns dedicated bike trails, hiking routes and single track into a playground. A typical trail includes downhills, climbs and flat sections. Good trails are peppered with moderately sized features like berms, jumps and rock gardens. Most riding in the UK is trail riding.

Enduro

Is a higher stakes version of trail riding, Enduro combines bigger features and steeper descents with more velocity. It demands burlier equipment, lots of suspension travel and powerful brakes.
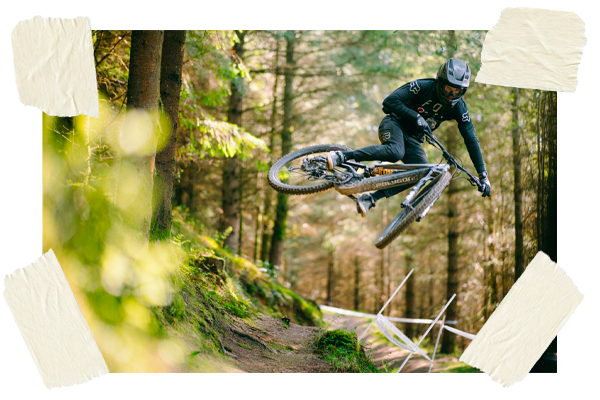
Downhill

is a gravity fuelled adrenaline rush where riders risk life and limb to ride down impossibly steep and technical terrain with speed and finesse. Downhill riders are equal parts brave and bonkers.

Alt Text Here

Glossary of Mountain Biking Jargon

Mountain biking is a minefield of tricky terminology. Here’s our 2-minute crash-course to the most common terms and phrases that you will almost certainly come across when comparing different bikes and reading through the rest of this article.

All-Mountain - another way of saying “all-rounder”. All-Mountain bikes are designed to be versatile so that one bike can be ridden in different scenarios.

Berm - a banked corner, typically found on man-made trails.

Chainset - this includes the bottom bracket, cranks and chainring.

Dropper Post - an ingenious piece of kit which allows your saddle to be positioned high for pedalling and low and out of the way for descents, at the press of a button.

Flow - a zen-like state of mind where the bike and rider are at one and even the most challenging trail becomes all too easy.

Full Suspension - a bike with suspension at the front and rear of the bike.

Geometry - a collective term for the array of dimensions, determined by the frame design, which dictate the way a bike handles.

Group Set - a collective term for all major the mechanical components on a bike (brakes and running gear)

Hard Tail - a mountain bike with suspension in the fork, but without suspension in the rear wheel.

Head Angle - this is the angle of the suspension fork relative to the ground. A typical head angle for a modern, short-travel trail bike is ~67 degrees. XC bikes are typically steeper (~69 degrees), which improves traction when climbing, and downhill bikes are slacker (~63 degrees) to improve stability at speed and to absorb impacts from objects on the trail.

MTB - short for “mountain biking”

Slack Geometry - a geometry with a low “head angle” designed for more downhill focused riding.

Rake - also known as “fork offset”, rake is the distance between the axle and a straight line through the head tube. Lots of rake is typical of slack geometry.

Reach - the horizontal distance between the bottom bracket (the bearing where the cranks attach to the chain ring) and the centre of the handlebars. It is an indicator of how the bike fits you, whether it will be too cramped or too stretched out. Modern bike geometries typically have more reach.

Running Gear - also known as the “drivetrain”, these are the components responsible for propelling a bike forwards, including: Cranks, gear cassette, chainring, derailleur, chain.

Singletrack - a narrow, foot-wide trail that’s ideal for biking.

Standover - this measurement indicates the height of the top tube just forward of the saddle. A low standover height is desirable for self-preservation reasons.

Choosing a mountain bike

Before you hit the trail, you’ll need a bike. A strong and capable bike is the most fundamental ingredient for fun riding. Before you’re ready to buy one, you need to know your way around one.

Choosing a bike can be time-consuming and mountain bikers have a reputation for sweating the small stuff. Follow these 7 basic steps and you’ll find a bike that fits the bill.


1. Match the bike to the terrain
2. Choose between a hardtail and full suspension
3. Pick the right suspension travel
4. Select a wheel size
5. Set your budget
6. Look out for these components
7. Find a frame size

1. Match the bike to the terrain

Bike manufacturers design and market their bikes for riding different terrain. The first step in choosing a bike is deciding on the terrain you want to ride.

XC

Cross-Country bikes are about speed and efficiency. They are lightweight, have faster rolling tires and minimal suspension. Featuring a more upright frame geometry, XC bikes position the rider for better traction on steep inclines and optimal pedalling efficiency.

Trail

Trail bikes combine moderate suspension travel, typically between 120 and 140mm, with an all-mountain geometry. The geometry is designed to feel comfortable and confidence inspiring going downhill and positions the rider for steep inclines too. Trail bikes walk the tightrope between.

Enduro

Enduro bikes juggle pedal powered ascents with hair-raising downhills. The riding position, suspension travel and components are optimised for going downhill, so Enduro bikes are heavier and less capable uphill. They are a good all-rounder for somebody that wishes to ride trails, downhill and bike parks, and are the obvious choice for somebody looking to ride abroad in locations like the Alps.

Downhill

These bikes are designed entirely for gravity riding. Long-travel suspension, ultra-knobbly tires, and heavy-duty frames suck-up the terrain beneath them. The geometry, construction and components are designed for steep descents and big impacts. Forget pedalling efficiency, uplifts and chairlift rides get you to the top of the run, gravity does the rest.

Our recommendation

A “Trail” bike is a good starting point for mountain biking in the UK.

Alt Text Here

2. Choose between a hardtail and full suspension

Mountain bikes come with one of two suspension configurations: hardtail and full suspension. Full-suspension bikes are more capable in difficult terrain, but there are instances when hardtails trump full-suspension rigs.

Hardtail mountain bikes have a suspension fork and a rigid tail. Full suspension bikes... well, that’s obvious, right?

Hardtail bikes are preferred by XC riders because they are lighter and more efficient at turning pedal power into forward momentum. Typically, hardtails are more affordable than full-suspension bikes, so they are a good starting point for any wannabe mountain biker. And, Hardtails have fewer movingparts, so they require less maintenance – Manufacturers of rear-suspension shocks typically recommend servicing after 60-100 hours of riding.

Full- sus bikes are designed to tackle more challenging terrain and can be ridden faster over bumpy ground. Rear suspension also makes the rear of the bike much more supple, making it easier to keep your feet on the pedals and land softly from drop-offs and jumps.

Our recommendation: For Cross Country riding and budget conscious beginners, hardtails are an obvious choice. Commuters who want a bike to travel to and from work in the week and thrash trails in the weekend will also appreciate the simplicity and weight saving of a hardtail. Full-Suspension bikes are easier to handle on rough terrain and encourage fast skill progression, they are a clear choice for anybody that wants to ride challenging trails and catch some airtime.
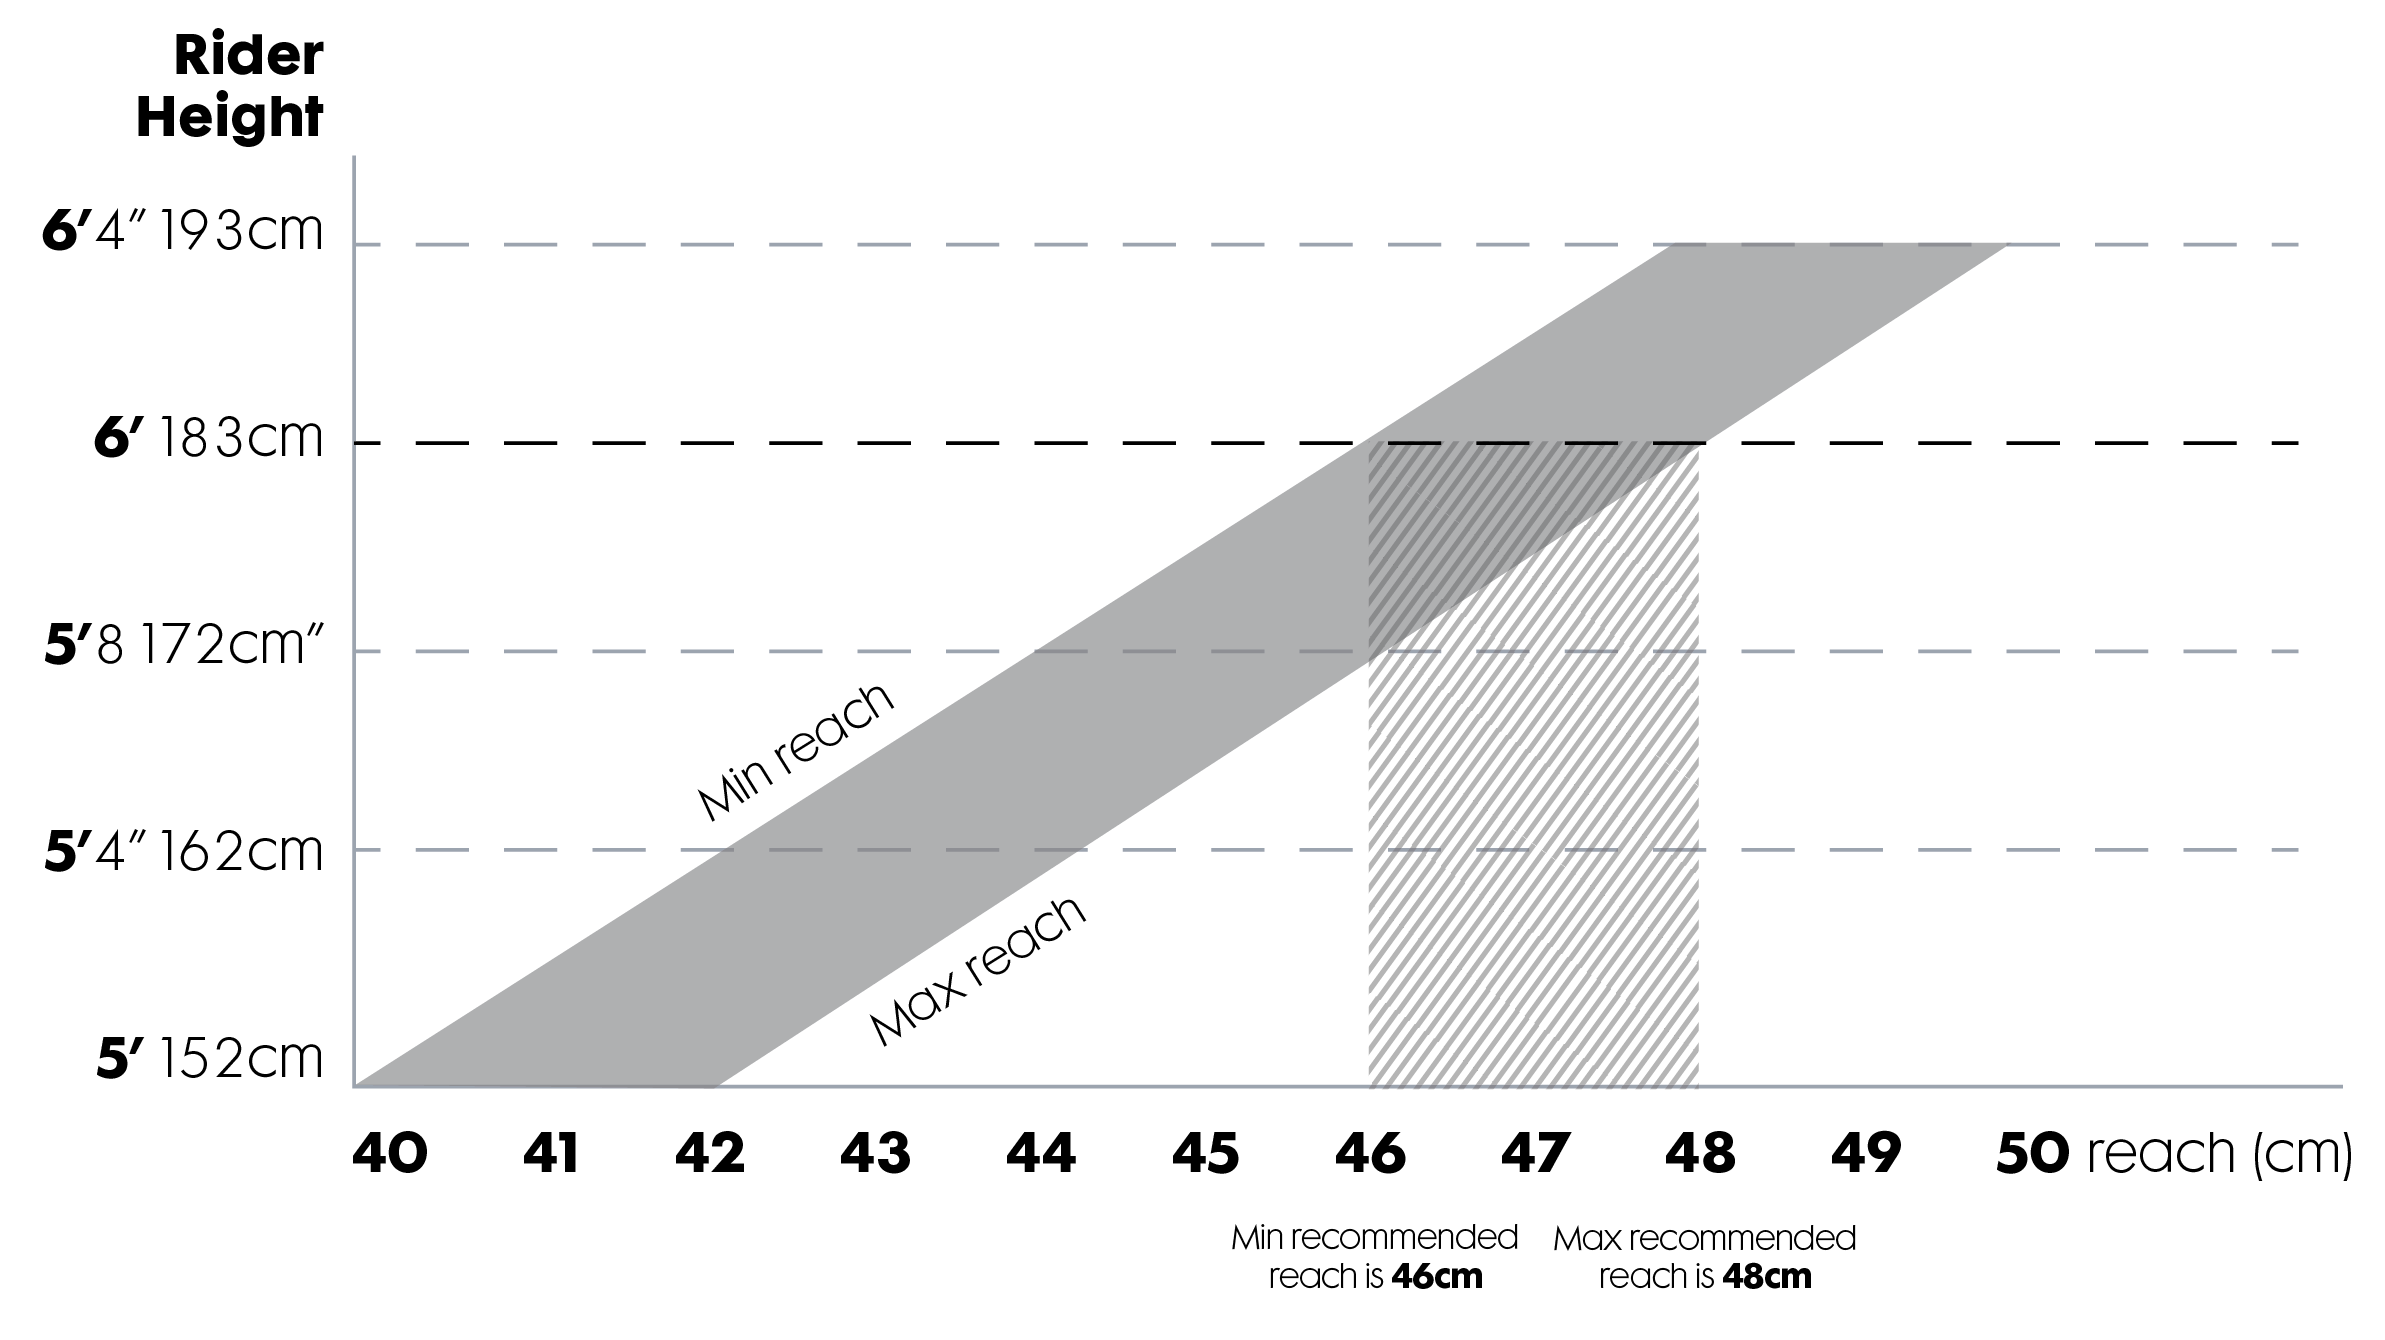
3. Pick the right suspension travel

Bike suspension absorbs vibrations from uneven surfaces and impacts from riding over and off obstacles. There’s a trick to choosing the right amount.

The suspension “Travel” measurement is the maximum vertical distance (mm) absorbed by the suspension before bottoming-out. Mountain bike suspension ranges from 80mm to 200+mm, the greater the travel value, the more capable a bike will be at absorbing small vibrations and sucking-upbig impacts. But you don’t get all that lovely plush cushioning for free; the longer the travel the heavier the suspension and the less able the bike is at climbing.

XC bikes

Rarely have more than 100mm, this keeps them light, responsive, and easy to pedal uphill.

Trail bikes

120mm and 140mm is a good amount of travel for a trail bikes, enough to iron-out roots and rocks on the trail and take the sting out of small jumps and drops, without adding unnecessary expense or weight.

Enduro bikes

Capable of riding serious terrain and have 150mm and 180mm of travel that devours roots and rocks, and inspires confidence. They’ll go uphill too if you have the lungs.

Downhill bikes

>More than 180mm is the reserve of specialist downhill bikes. These bikes roll over any and everything without batting an eyelid. Ideal if you’re catching a lift to the start, but not much fun if you have to pedal.

4. Select a wheel size

Wheel size is akin to religion in mountain biking circles! There are two common wheel diameters, 27.5 and 29 inch. Despite the rhetoric, there isn’t really a wrong choice, just a better one.

The consensus amongst mountain bikers is that bigger wheels roll over rough ground and obstacles with less resistance, making them faster and more confidence inspiring. Smaller 27.5” wheel bikes are more agile and easier to get air bound.

Our recommendation: Most of the time, riders taller than 6ft feel more comfortable with a 29” wheel. Riders shorter than 5ft 6in are better matched with a 27.5” wheel. Somewhere in the middle? Then you are free to choose!

5. Set your budget

Often, it’s not obvious why a top-end bike should be three, even four times the cost of an entry level model. How much should you spend?

First off, it is not necessary to spend silly money to get a great bike (especially at GO Outdoors)! Our suggestion? Spend as much as your budget and conscience allow.

Bike ranges are tiered, often offering the same bike with a variety of different build specifications. The trick is to find the sweet spot where high quality components meet great value for money.

Our recommendation: These days spending between £1000 and £2000 buys a very capable trail bike that is ideal for UK riding. Upgrading components individually is expensive, so it’s best to bite the bullet and invest in the right bike specification from the get-go.

6. Look out for these components

There are certain components, like a dropper seatpost, that we wouldn’t do without, and you shouldn’t either. Upgrading individual components is expensive so be sure to add these bits and bobs to your Wishlist. In a few months from now you’ll be thanking us.

Hydraulic disc brakes- these are a total deal-breaker. Rim brakes and cable-action disc brakes will not deliver the stopping power that modern trail riding demands, avoid them unless you simply cannot afford hydraulic brakes or if you’re not interested in riding steep trails.

Dropper post - on UK trails your saddle will be up and down like a yoyo. It’s no fun to move your saddle up and down manually, so make sure your new bike comes with a dropper or add one yourself.

Shimano or SRAM gears with a single chain ring - in the 90s maxing out on gears brought an inordinate kudos - If you had 18 gears, your neighbour’s kid probably had 27. It was one-upmanship at its pettiest. Those days are gone, it’s no longer necessary to get lost deep in gear combos with countless overlapping ratios. Stick to a single chain ring and as many gears on the rear cassette as you can get. Look for “1x10”, “1x11” and “1x12” offerings from Shimano and SRAM, two brands you can trust to deliver dependable, long-lasting performance.

Clutch derailleur - this clever piece of kit keeps a bike’s chain under tension, but still allows rear suspension to function unrestricted. Say goodbye to noisy chain slap and unexpectedly losing your chain. Most derailleurs built by Shimano and SRAM in the last 5 years include this technology.

Air sprung suspension fork- air sprung suspension forks are more supple, lighter, and customisable. Spring-powered suspension still has its uses, particularly on big-hitting downhill bikes, but most of thetime an air fork from a reputable brand like RockShox, Fox, Suntour and Marzocchi will provide bettertrail performance. Just beware that air sprung suspension shocks and forks will have shorter service intervals than coil alternative and are more expensive to begin with.

Tubeless ready - “Tubeless” is running a bike tyre without an innertube. The advantage of losing the innertube is being able to run lower tyre pressures for better grip, without the increased risk of pinch punctures. Because a liquid sealant is used to make the tyre and wheel airtight, small punctures are self-sealing. A “Tubeless ready” bike is one that can be converted to tubeless with minimum effort.

7. Find a frame size

Choosing a frame size is the final step of picking a bike. Manufacturers use T-shirt style sizing (S, M ,L & XL) to make finding the right size as intuitive as possible. Great... unless of course you’re between sizes. Then what?

Truthfully, there’s no better way to know if a bike fits you than trying it for size. Visit a GO Outdoors store to throw your leg over a saddle. If you cannot make it to a store, keep an eye on the REACH and STANDOVER measurements. A longer reach dimension affords space for taller riders to move freely on the bike. Pay attention to standover height too, too much might do you a disservice! Shop Mountain Bikes here

Basic Mountain Biking Skills

If you can already ride a bike you’re halfway there! To give your first outings on a mountain bike the greatest chance of success, here are five fundamental skills worth practicing.

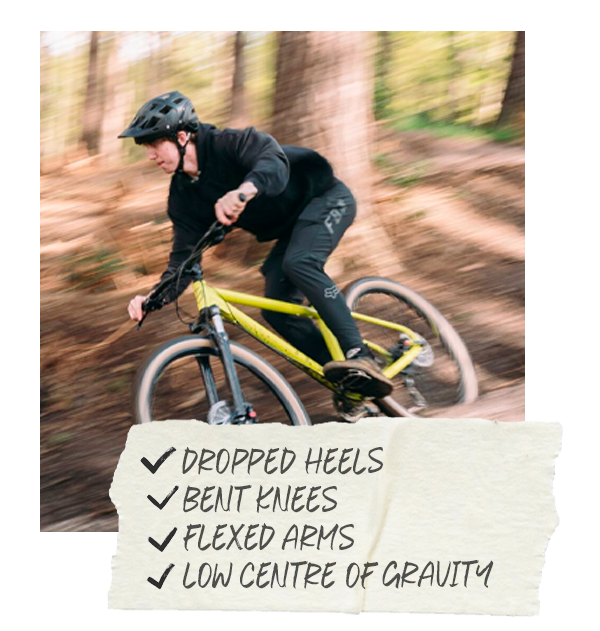
1) Standing correctly on a bike

Seriously, standing on a mountain bike correctly takes practice. It’s not a given, even experienced cyclists who have logged thousands of hours in the saddle get it wrong. It’s the foundation to feeling comfortable on the bike and keeping your centre of balance in the right place.

If you only listen to one pieces of advice from this guide, it’s “keep your heels down and your knees flexed” when descending on a mountain bike. Keeping your heels down will automatically place your weight further back on the bike, ready to counter obstacles that want to stop forward momentum. Keeping your knees flexed will enable your body to absorb shocks and for you to move around on the bike, important for getting grip to the tyres.

Alt Text Here

2) Looking ahead, not down

Looking at the ground directly in front of your wheel is a cardinal sin. Instead, look 20-30ft ahead, it’s amazing how your brain will adapt to the terrain immediately in front of you automatically.

Not only will you be unable to pick a line through a trail’s features without looking up, but with your head peering over the handlebars and weight forward your centre of balance is shifted dangerously forward. Look ahead, relax and trust your brain and the bike’s suspension to handle the trail beneath you.

3) Braking

Hydraulic brakes stop a bike terrifyingly quickly. If your weight isn’t back behind the saddle, you’ll be ejected over the handlebars like a roman catapult.

Save yourself months in traction by practicing your braking technique before hitting the trail. Before squeezing the brake levers, first drop your heels and move you weight back, behind the saddle. For this reason, it’s a good idea to lower your saddle when descending - a dropper seatpost is a Godsend!Shifting your weight back will counter the force created by the sudden deceleration of your bike trying to throw you forwards. Braking isn’t an all or nothing affair, practice modulating the breaks to control speed. And remember, when a tyre is being used to slow you down, its friction with the trail surface isn’t being used to control direction. Adjust your speed before entering tight corners and steep terrain so that the bike’s tyres are free to steer you to safety.

4) Railing a turn

Contrary to popular belief, leaning the bike over like Valentino Rossi will put you in a hospital bed sooner than you can scream “Mama Mia!”. Knowing where to put your bodyweight during turning is an important skill.

Leaning into corners like a Moto GP rider is one of the most common mistakes made by inexperienced mountain bikers. Instead, load the outside pedal with your bodyweight on top of the bike. This applies downwards force to the tyres, keeping them gripping. On bermed corners it’s possible to lean into the turn a little more because the centrifugal force applied by the banking creates grip, but using the right technique on every turn will soon make it second nature.

5) Bunny hops

Sooner or later, you’ll get airborne, by choice or by chance. To do it right you’ll need to learn to bunnyhop. A good bunny hop is smooth movement that takes time and patience to master.

If you never picked-up a BMX as a kid, learning bunny hops in adulthood can be tricky. Once perfected, it’s a smooth movement that sends a bike skyward.

Step one is to move your weight behind the saddle. While keeping your pedals level, push your heels down, flex your knees and move your weight behind the saddle. Next, initiate a manual (like a wheelie but without sitting and pedalling into the position) by pushing your heels down and through, moving your backside further back and lifting the front wheel to put the bike into a manual (wheelie).As the front wheel is reaching its peak, transition quickly to launch upwards into a standing position pulling upwards on the handlebars. If done correctly, in one seamless movement, the bike should launch into the air and level out in the air landing with even weight distribution on both wheels. If you land heavily on the front wheel then the launch trajectory was too forward.

The other gear you’ll need

The spending isn’t over yet. You’ll need a few more bits and pieces, like a helmet, apparel, and tools, before you’re ready for the trail. If you intend to spend good money on a bike, don’t skimp on the rest of the gear, it’s just as vital to a good time on your bike.

Women specific saddle - The first order of business for any female rider is to swap out your saddle with a female specific gel saddle. Ignore at your own discomfort.

Helmet - The sheer number of helmet options on the market is astounding.

XC riders, like road cyclists, prefer a shallower fitting helmet with good aerodynamics and ventilation. Because of the risk of serious injury from downhill mountain biking, wearing a full-face helmet that offers the highest level of protection to your head, jaw and face is a no-brainer.

For trail riding the best choice is an open-face trail helmet with extended coverage at the back and sides of the head. Trail helmets provide good ventilation at slow speeds for long, unrelenting climbs.

Brands such as Met, Bell and Giro now cater for Enduro riders with full-face helmets that feature chin/jaw protection which can be removed for the uphill sections.

Use our size guide for help getting the right fit.

Shop Helmets here

Body Armour - Although it’s not used universally, we recommend wearing body armour when mountain biking. Lightweight, non-restrictive knee and elbow pads are a must for riding trails - Even the most skilful riders take a tumble now and again. For Enduro and Downhill riding we advise looking at beefier knee and elbow guards and investigating spine and chest protection too.

Shop Body Armor here

Footwear - An old pair of Vans might work fine for a while, but a dedicated trail shoe designed for flat pedals is a better option. Five Ten, by adidas, is the market leading brand for flat pedal shoes. The shoes have a shock absorbent EVA midsole, a wide and stiff sole, and a protective toe box. Five Ten’s Stealth Rubber sole compound offers unrivalled grip on pedals.

Some prefer to clip into their pedals: Ironically, this is called “clipless”. The most universal system on the market is Shimano’s “SPD” system. All the key footwear brands, such as Five Ten, Mavic, and Shimano manufacture an SPD compatible trail shoe.

Shop Cycling Shoes here

Loose shorts and jersey - Motocross’ influence on mountain biking has kept lycra at bay. In case you are wondering about aerodynamics, if you need more speed, keep your fingers off the brakes! The look in Mountain Biking is tailored or loose-fitting clothing that accommodates body armour and the Christmas waistline. Aerated jersey fabrics keep cooling air flowing over your skin.

Any mountain bike short worth its salt will include a padded liner, also known as a Chamois. A word to the wise - Do not scrimp! A good short that protects your undercarriage from the saddle is worth its weight in gold. 50km into the Big Country Route in Glentrool you’ll be thankful you made the investment.

Shop Cycling Jerseys here

Winter layers - In winter, trail pants with a tapered leg, so you don’t catch them in the chain, are a must. A good pant will have a reinforced seat and room for knee pads. Look for easy to clean and abrasion resistant fabrics (like Polyamide), good ventilation, and zip-close pockets. A lightweight and breathable shell jacket with a pull tight hem and adjustable cuffs is also highly recommended. Ensureit will pack down to fit into your pack. If the hood fits over your helmet that’s a bonus.

Shop Cycling Jackets here

Gloves - Your hands are your primary connection with the bike. Gloves not only protect your hands from scrapes and calluses, but they are also vital for grip - Grip on the handlebars and grip on brake levers. Buy good quality gloves and replace them when necessary.

Shop Cycling Gloves here

Trail glasses - Lightweight and flexible trail glasses keep dirt, branches, bugs and wind out of your eyes. Avoid dark tints so they work in a variety of scenarios, like shaded forests. Look for a wrap-around design with good ventilation, as this will offer good peripheral vision and prevent misting. For added security and compatibility with dirt tear-offs (a quick way to clean a mud-covered lens) downhill riders often choose a goggle.

First aid kit - Now you’re a mountain biker you will invariably be involved in or witness an accident ortwo. Be prepared with a well-stocked First Aid Kit for cleaning and covering wounds and bandaging sprained joints. If you’re regularly riding in woodland, then be sure to carry a tick removal tool too.

Shop First Aid Kits here

Tools and Sundries- Getting a flat tyre 20 miles into a 40-mile loop is more than a mild inconvenience. By carrying a small selection of carefully chosen tools you’ll be prepared for fixing most problems. We advise carrying a shock pump... if only to check your suspension set-up before a ride. A bike multitool with allen keys, hex keys, and a Phillips head screwdriver are extremely useful for adjusting loose head sets and suspension linkages. Pack some Duct Tape and zip ties too, you never know when they’ll come in useful, but they always do. A small bottle of chain lube and bike grease completes this shopping list.

Shop Bike Tools & Sundries here

Inner tubes, tyre Levers and a pump- If you’re running tyres with innertubes then a couple of spare innertubes, a pump and tyre levers are essential. Tubeless tyres are self-sealing and therefore don’t require repairing for smaller punctures. In case something big comes along and puts a gaping hole in your tyre it’s best to carry a tubeless tyre plug kit and sealant.

Shop Bike Tyres & Inner Tubes here

A snack and hydration - Low energy and dehydration are your biggest enemies on a ride. Pack high calorie snacks and plenty of water on long rides. A hydration pack/bladder is a comfortable and safe way to carry lots of water.

Shop Energy Snacks here

Backpack - A backpack performs three jobs: It’s a water holder, back protection, and a bag to hold all the bits and pieces you need for a day on the trails. Unless you are bike packing, it’s a good idea to keep the back lightweight and slimline. Between 10 and 20 litres is an ideal volume. An integrated water reservoir with a drinking hose (Camelback) makes carrying plenty of water and drinking it mid-ride, easy. Well-designed shoulder straps with an adjustable sternum and waist strap will prevent the pack from moving when you do. Many MTB specific packs also offer built-in spine and kidney protection

Shop Cycling Backpacks here

Pre-ride bike preparation and changing an innertube

Before heading out for a day of riding, perform these checks to guarantee your bike is in top working condition. A bike in great working order will perform its best and is less likely to break mid-ride. Your maintenance routine should include:

• Check suspension sag

• Check tyre pressure.

• Clean and oil the drivetrain.

• Tighten rear suspension bolts (not necessary for hardtails).

• Check your bars and headset for play.

• Keep it clean!

Check suspension sag- For bike suspension to work at its best about a quarter (25%) of the rear wheel travel and 20% of fork travel should be sacrificed to “sag”. A rubber O-ring on the fork’s and rear shock’s stantions indicates the sag measurement. To measure the sag, load the bike by sitting onthe saddle while the bike is stationary, steadying yourself against a wall. Then, dismount the bike being careful not to work the suspension. The distance between the lip of the fork lowers/shock air can and the O-ring’s new location is the sag. To adjust the sag, add or reduce the pressure using a high-pressure shock pump, being careful not to exceed the manufacturer’s maximum pressure recommendation. Further tune the suspension by using rebound adjustment.

Check tyre pressure - There’s no magic number for tyre pressure. Most tyres are designed for pressure between 20 and 40 PSI. Less tyre pressure means a larger contact area with the trail and better grip. More pressure means less rolling resistance and less chance of rim damage or pinch punctures from heavy landings. Typically, most people will run a little less pressure in the front tyre and a little more in the rear tyre. Whatever pressure you decide on, it’s a good practice to check your tyre pressures before a ride.

A well-maintained drivetrain runs smoothly- Post ride, after a thorough clean and degrease is the perfect time to oil your bike’s chain and adjust the rear derailleur if the gears are not indexing correctly. Before setting off on a ride an extra squirt of oil (and removal of any excess) will help your bike to run like a... erm... well-oiled machine.

No play in the rear suspension - The rear suspension of a mountain bike experiences a lot of forces from all different angles. The result of these forces and relentless vibration is the connecting bolts working themselves loose. To perform to their best and to prevent the bushings and bearings getting damaged, the linkages need to be firmly connected. Check the bolts between every ride using an allen key. Just don’t overtighten them!

Check your bars and headset- When your headset and bars are loose the results aren’t usually pretty. Use an allen key to make sure the bolts on your stem and headset are tight. Overtightening bolts is almost as bad as leaving them loose, so, make sure they are tightened to the manufacturer’s specified torque rating (usually detailed on the component) using a torque wrench.

Changing a flat- If you’ve never learnt to change an innertube now is the time to learn! First, remove the wheel from the bike using the quick release. Remove the valve cap. If your tyre is flat there shouldn’t be any air in the innertube, but if you’re practicing, let the air out first. Using a pair oftyre levers, remove the tyre from the wheel and then the punctured innertube. Inspect the tyre for the sharp object which caused the puncture. If you cannot see it, then run your fingers along the inside of the tyre until you feel it. Once the cause of the puncture is removed. Work one side of the tyre over the wheel rim and then place the innertube (with a little bit of air inside into the channel between the wheel rims making sure the valve is poking through its hole in the rim. Work the other side of the tyre over the rim. Finally, inflate the innertube to the desired pressure, slowly to begin with, ensuring that it isn’t being pinched between the rim and tyre wall. Now reattach the wheel. Sorted. If this all sounds like too much work, try tubeless.

Give it a good clean- There’s nothing sadder than an unloved bike. After a good ride, reward your faithful stallion with a little TLC. A thorough clean with products formulated so not to damage the bikes components are well worth the cost. Towel the bike down before putting it back into storage. If using a pressure washer do not spray the bottom bracket or suspension linkages at close range.

Shop Cycling Parts & Maintenance here

Where to ride

In the last 20 years, with help from government organisations like Forestry England and the back-breaking work of hundreds of volunteer trail builders, the UK has become a world-renowned destination for mountain biking. Up and down the country our hills are chock-a-block with incredible trail riding and downhill mountain bike facilities. Discover a handful of the UK’s best mountain biking locations below or click the link to read our whistlestop tour of UK Mountain Biking.

Surrey Hills, Surrey

Beneath the leafy canopy of the Surrey Hills (AONB) is a hidden network of mountain bike trails that stretches from Rowley in the west to Holmwood in the east. Making the most of the North Downs’ elevation, this singletrack heaven has become London’s premier mountain biking destination. The trails are centred around the charming village of Peaslake and are within striking distance of Guildford and its many bike shops. Most of the trails are graded green and blue, but there are short stretches of black graded trails, including “Deathstar” and “Crackpipe”. This is not a trail centre, so visitors need to use local amenities. Find out more here

Forest of Dean, Gloucestershire

The Forest of Dean is one of, if not the best place to mountain bike in England. Visitors will find almost 50km of trails for all abilities and 14 dedicated downhill lines graded from blue to double diamond black, for the lunatics. It is all cared for by the good people at Forestry England. Investment into the centre is ongoing and the recently added Adit loop, part of the “Freeminers Trail”, blends the best of natural and manmade features. In 2021, Mountain Biking UK awarded the “Verderers Trail” the accolade of best blue trail in the UK – the perfect day out for aspiring newcomers to the sport. The FOD is a short drive north from Bristol and daytrip-able from the Midlands. Find out more here

Llandegla Forest, Wales

The Clwydian Range (The Clwyds) and Dee Valley sit along the Welsh boarders. For day-trippers from the Northwest of England’s big cities (Manchester & Liverpool) they’re a short drive. The trail centre at Llandegla Forest is an obvious place to begin exploring the area. The trails, which range from easy to expert, are well maintained and start from the parking. Recent additions to the black trail network give advanced riders and adrenaline junkies something to smile about: “B-Line” and “Parallel Universe” are epic. The centre’s café is legendary and a perfect finishing spot. Beyond the borders of the trail centre the Dee Valley and the Clwyds hide an abundance of trails to be discovered.. Find out more here

Fort William, Scotland

The UCI Downhill World Cup has taken place at Fort William since 2002. The event was the spark that ignited Scotland’s obsession with mountain biking and its venue, the Nevis Range, holds a special place in British Mountain Bikers’ hearts. The Lower Forest Trails, which are designed to suit all abilities, weave their way around the base of Ben Nevis. More experienced riders come for the three downhill trails which are accessible by Gondola. Two are graded expert, including the World Cup track, but there’s now a new blue trail for mortals to enjoy too.. Find out more here

Cannock Chase, Staffordshire

40 minutes north of Birmingham is Cannock Chase. An Area of Outstanding Natural Beauty, the trails here are the result of 34,000 hours of trail digging. Free to ride, the gentle berms and rollers of Perry’s Trail make it a perfect starting point for fledgeling bikers. The 23Km long “Monkey Trail” is fast and flowing, tight and technical, and is a good test of any rider. Next to the cross-country loops is Stile Cop Bike Park for the brave.. Find out more here

You are now an oracle! In this guide we’ve covered the different types of mountain biking; the best places around the UK to ride; all the equipment you’ll need; tips for preparing your bike for the trail and some basic riding skills. Right now, there’s almost nothing you don’t know about Mountain Biking. Take that knowledge and get out on the trail.

ENJOY THE RIDE!